Check Out Our Regular Double Bay Window Curtain Tracks!
Top Quality & Amazing Value for Money!
- Guaranteed perfect regular double bay window curtain tracks
- Guaranteed super easy ordering
- Guaranteed 10 years
- Guaranteed QUICK & FREE delivery

What our customer say...
Show/Hide Transcript
Introduction to Double Bay Tracks
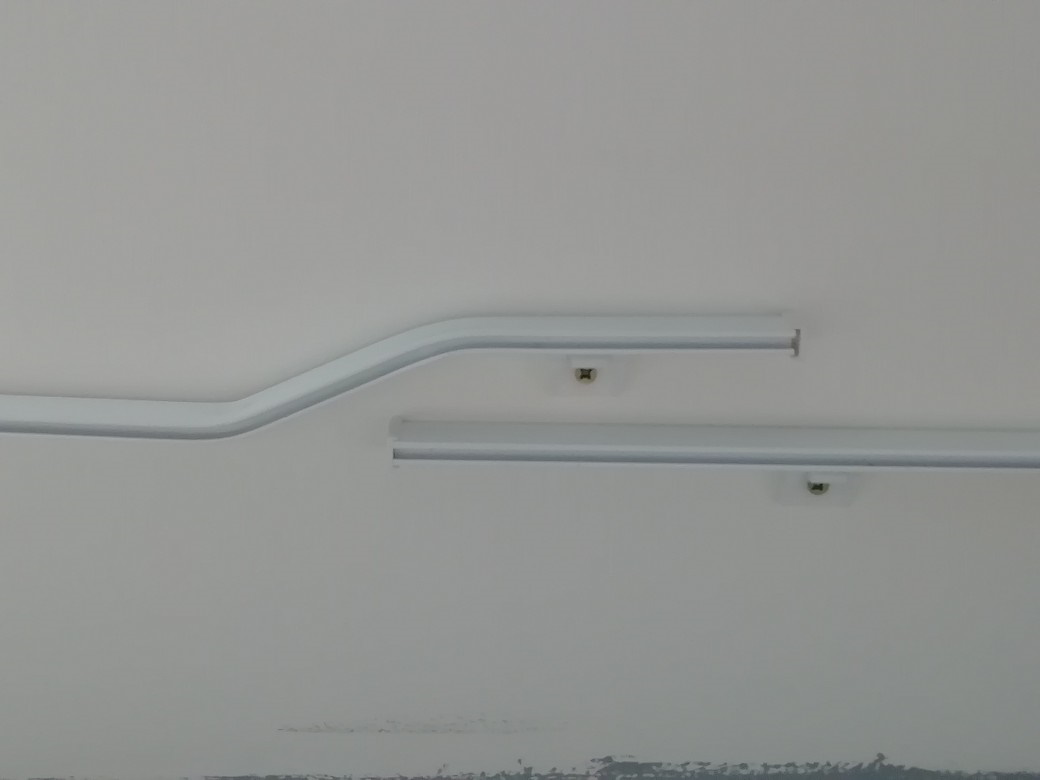
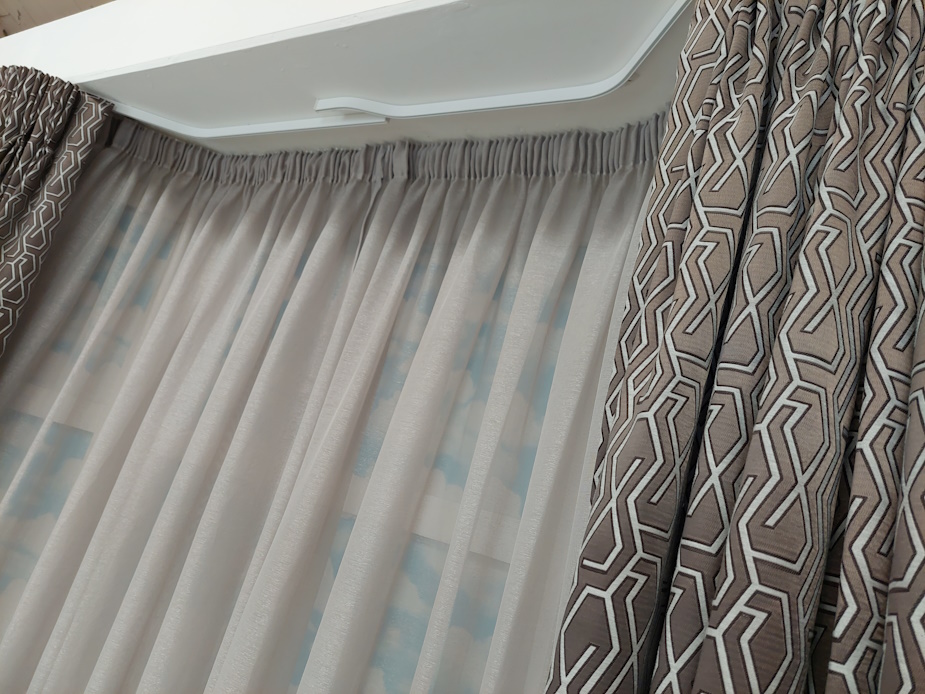
Hi. I'm Lee Stevens from ezecurtains.co.uk, and I want to give you a quick introduction to our regular double bay tracks. Now you see some images coming up on the screen here that show you the tracks fitted to the ceiling within the bay and the main ones turning out onto the returns, which are wall fixed. Now there's ten centimeter gap between the two tracks, which allows you to move your main curtains without dragging your sheer curtains with them when you're opening and closing.
Sheer Curtains and Track Options
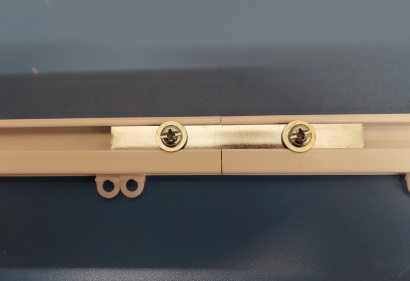
So we've got the sheer curtains here, which are on a track with a joining splice in the middle. This means it's just one long continuous piece of track. You don't need don't need the overlap option on this. On the front track, we do have the overlap option on this, but should you want, you could also have the joining splice that just have it as one continuous track.
Functionality of Rear Sheer Curtains
Now on the rear track here with the shears, the shears stack back so far. They do not go behind the main curtains. They don't go travel around the corner here. The only reason they really open is so that you've got access to the windows for cleaning maintenance.
But ninety nine percent of the time, they're going to stay over the window like you can see here.
Movement of Main Curtains
Now, on the main curtains, you can move them across the window.
And in this example, we've got the overlap. So one overlaps the other curtain, and they look really neat and hang great.
Benefits of Track Design
Now when we move them back, you can see that we're not dragging that sheer curtain.
Conclusion and Ordering Information
It stays where we've left it. Now that's the reason why we got the gap between the two tracks. So I hope you like that and you like the look of it, And you can order tracks to fit your bay exactly on the calculator below this video.
Track spec
- Track: Aluminium
- Brackets/gliders: Nylon
- Depth: 23mm
- Width: 10mm
- Top of track to bottom of inside of glider 30mm
- Pre-bent to the exact shape
- We select the correct brackets needed
(1 bracket every 30cm approx.) - Supplied with plenty of gliders
- (20 gliders per metre and part thereof)
Example of how the double tracks fit in this bay window shape. This allows for 2 pairs of floor length curtains.

The sketch above shows a top view of the position of the double bay tracks on a "splay bay with returns" style bay window.
Double bay window curtain tracks don't have to be double the trouble! Or double the price
Been shopping around and been shocked by the price for custom made double bay tracks?
Not sure how you would even measure to get the perfect fit. It looks too complicated to do yourself!
Don't want to get it wrong and end up loosing money?
Then we can solve all those problems. As we guarantee you will get a great price starting from only £275.
We guarantee the curtain tracks will fit your bay perfectly. Or we remake with our NO quibble guarantee. Even if you made the mistake.
We also give a 10 Year quality garantee.
We offer great support with the measuring. Also, showing you how to fit these bay window curtain tracks successfully. Even if you have never tackled a project like this before.
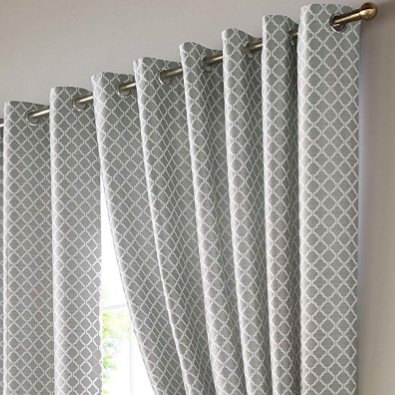
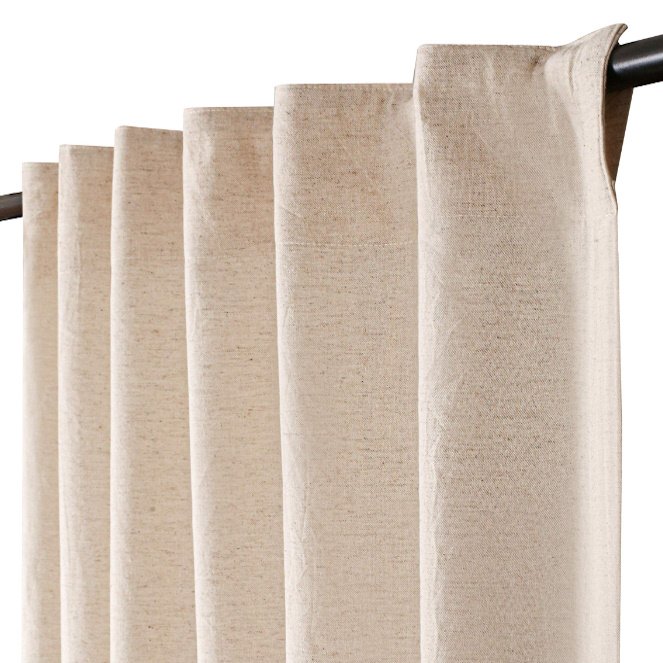
Our regular double bay window curtain tracks allows you to hang 2 pairs of curtains on the same bay window. This allows you to hang a pair of sheer light filtering privacy curtains on the rear track. Then to hang a pair of main lined curtains on the front curtain track.
These are nothing like the ready made double track solutions you have seen elsewhere on the internet or in store. Everything is top quality and made exactly to fit your bay window as you want.
Swipe left of right to see more - click image to see larger pop up
Our Guarantee
 Track Fits Exactly |
Smooth Curtains |
10 Year Guarantee |
Our Guarantees
|
Track Fits Exactly |
Smooth Curtains |
10 Year Guarantee |
What our customers say...
What our customers say...
What you get with our regular double bay window curtain tracks
- FREE fitting video
- Pre-shaped track
- Fully assembled ready to fit
- Choice of multiple brackets
- Overlapping tracks option
- Multiple video guides
- Top quality curtain tracks
- Q & A Support
- FREE delivery
- Correct screws & plugs
Regular Double Bay Track FAQs
Ordering is simple! You just need to do the following things:
Once your order is placed, we custom-make your track and ship it straight to your door, ready to install.
If you still have questions then you can ask our "Help Assistant" using the button in the bottom right of your screen for a super quick reply. You can also get in touch via the contact form here if you need further help.
If you are not sure if this is the right track for your bay. Then get in touch with us here. Please send us a photo of your bay and let us know how you want your curtains to hang. Such as in front of the sill. Or down to the sill. Staying in the bay, or returning out of the bay. You can watch the video here that shows you how to take a great photo showing everything we need to see.
Show/Hide Transcript
Importance of Accurate Photos for Curtain Orders
Hi, I'm Lee Stevens from Ezecurtains.co.uk and I want to talk to you about photos, photos that you'll send to me through the contact form when you're making an inquiry, or photos that you attach to an order like a bay window curtain track order. Now, we need to see a full shot of the bay. So we need you to stand on the far side of the room so you can get the top of the window in where the track's going to fit, also, the full windows ill around the bay, and out each side of the bay if the curtains are returning outside of the bay.
Tips for Capturing Essential Window Details
Then you may want to take a second shot of the windowsill. If you've got curtains hanging like here, pull 'them to one side, take a shot of the window sill, especially on the end because that's often critical to how the bay track is going to fit. And also how your curtains are going to hang. So below this video you will see some dos and don'ts of the right ways to do your photos.
Conclusion and Additional Resources
So, please have a look, and hopefully this has helped you. And thanks very much for watching.
We make measuring easy! We provide a detailed video guide tailored to your bay window shape. You'll just need a measuring tape and a few minutes to take accurate measurements. If you’re unsure, send us a photo of your bays, and we’ll advise you before placing your order.
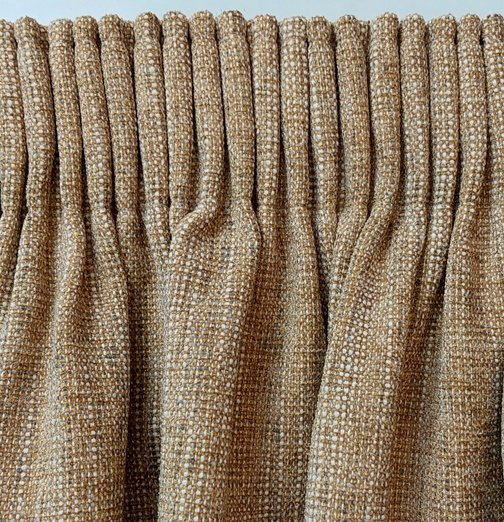
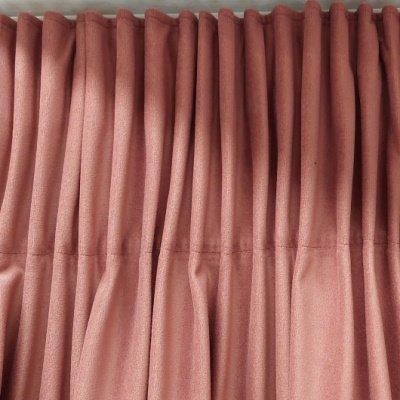
These curtain styles CAN be hung from any of our standard glider curtain tracks.
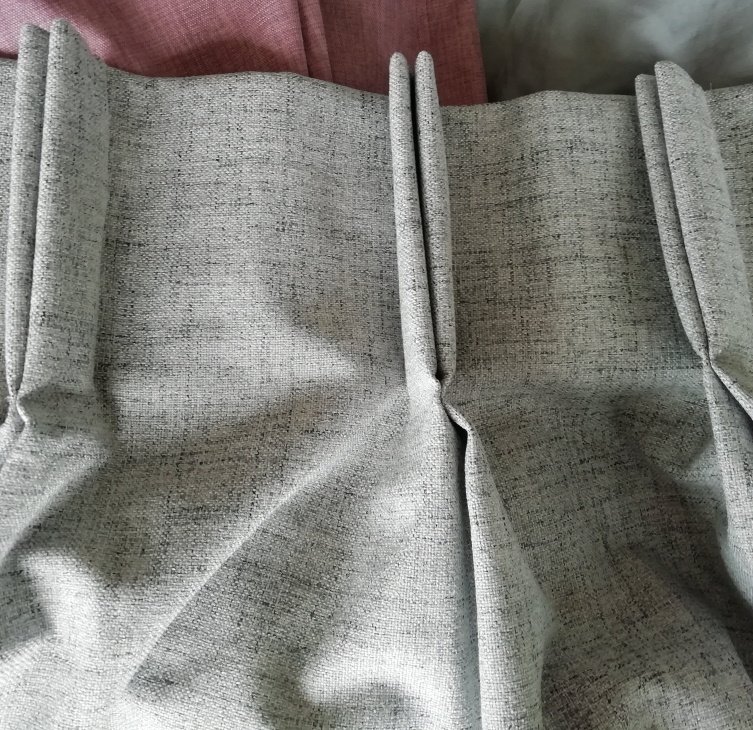
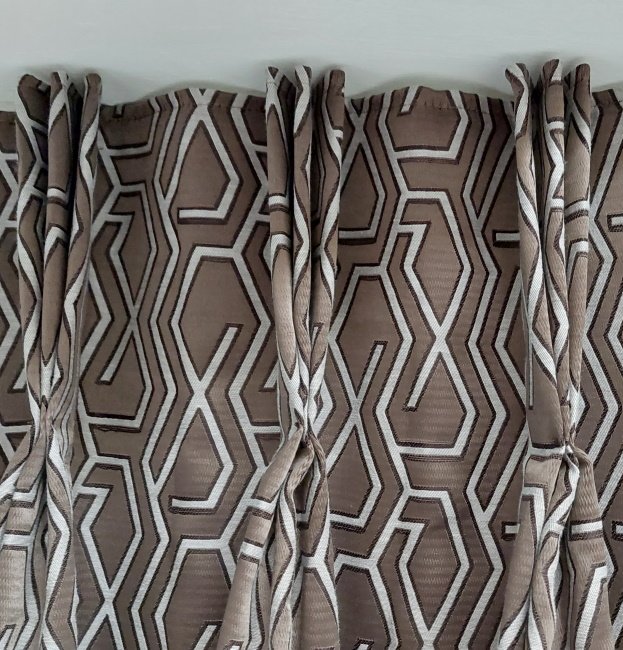
These curtain heading styles you CAN'T hang from our standard glider curtain tracks.

Watch this video and discover what we mean when you see the word "returns" on this website.
Show/Hide Transcript
Hi. I'm Lee Stevens from ezecurtains.co.uk
Understanding Returns in Curtain Tracks
And I want to talk returns to you. We talk on this website about bay returns and we talk about curtain track returns.
Defining a Return
Now, a return is like up here.
Now this, the track comes out of the bay and returns onto the wall into the room. Now, that's a return. Now, if you've got a bay that may be a five-sided bay and you've got a bit of wall here on the side, that is not a return. That's just an internal bend. It only returns if it comes out onto the wall here.
Sizing Your Returns
Now returns can be pretty much any size you want them to be except there needs to be a minimum of fifteen centimeters. So we've got a flat track here that is on a wall-fixed bracket it can clip comfortably back into the bracket. If it's curved, then the bracket won't connect into the back of the track. Now, some people want their return to fill the entire space on the wall, on the side of the base. That's absolutely fine. So you can have a big return, but typically you'll have a return around about twenty centimeters coming out of the corner of the bay across to the side here.
Conclusion and Ordering Guidance
So I hope that's useful, and now you know what we need and what we call a return. When you're ordering, you'll understand what we're talking about.
You can also read more about "returns" here on this page.
If you are fitting your bay track to the ceiling. Either in the bay only, or on the returns as well. Then you may want to add "brakes" to your order. Watch this video and see what they are.
Show/Hide Transcript
Introduction to Curtain Tracks
Hi. I'm Lee Stevens from ezecurtains.co.uk
Understanding Curtain Track Brakes
And if you're ordering our regular curtain track that's either for a bay window or a straight window, you may want to add brakes to your curtain track. So what are brakes and what do they do? So let's go and have a quick look.
The Importance of Leveling in Installation
If you fitted a track to a ceiling in a bay or a ceiling over a window, it's more prevalent on ceiling fixed tracks where the track to the ceiling may the ceiling may not be perfectly level. And what happens is gravity has an effect. So you take your curtains, you've then opened them up like so, but because of a slight slope on the ceiling, the curtain wants to start creeping back down the track again. So this is where the brake comes in. So let's have a look at what a brake is, and how you fit it to your track.
Preparing for Brake Installation
I've unhooked the first couple of hooks, and put the curtain back to one side. We've got our curtain drawer rod hanging here and we add these to pretty much all the orders that we supply and fit ourselves and they're great for opening and closing your curtains and these fit on the second glider in.
Fitting the Brake on the Glider
Now, on the first glider, this is where we're going to fit our little break over the top of that glider.
Close-Up on Brake Mechanism
And a little close-up, it's hard to see, but it's like a little four legged spider or little table with no top on it. So let's move in really close and have a look at how we clip this over the first glider.
Aligning the Brake for Proper Fit
Just before we fit this little break on, you'll find that the four legs on it, that they're narrower on one side and wider on the other side. We want the wider ones to be fit into each side and the narrow ones front to back. Now, this little break, the little legs on the back of the break fit into the channel. Give it a squeeze.
Securing the Brake in Place
I know it's very difficult to see because my thumb's in the way, but the front legs are going to fit into the front of the track. So we're gonna squeeze it, and the front legs have gone into the front of the channel, and the back legs have gone into the back of the channel. And that provides the friction that we need on this track. So, we'll have a look at now how it affects the free flowing of the curtains.
Testing the Brake Functionality
So let's push the curtain back now, and that break holds the curtain in place. It's only a little bit of friction on the track, but it's enough that if you've got a slope on your track ever so slight, you're not going to find that creep back across your window and effectively where you leave the curtain is where it's going to stay.
Conclusion and Ordering Information
Back again, and there we go. So it's as simple as that, and I hope you found that useful. You can order these either with your track or you can order them afterwards.
Your choice.
When it comes to the middle of your bay track. You have 3 options to choose from. The first 2 options are custom made overlapping tracks. Either "right over left" or "right over left". The 3rd option is to have the connecting tracks with our heavy duty joining splice.
Choosing the overlapping tracks option. Allows your curtains to completely overlap when closed. This is a great option if you plan on hanging blackout curtains. As you get almost total light block from the middle of your window.
I even recommend it on non blackout curtain windows. As the curtains hang really well when closed. If you choose the track joining splice option for the middle of your track. Then your curtains will simply butt up together when closed.

If you are fitting your bay track to the ceiling. Either in the bay only, or on the returns as well. Then watch the videos below.
Show/Hide Transcript
Introduction to Curtain Installation
Hi. I'm Lee Stevens from ezecurtains.co.uk
And I get lots and lots of people telling me my ceiling isn't strong enough to support a ceiling fixed curtain track. I need to know where the joists are so I can fix all my brackets into the joists. Your ceiling almost undoubtedly is going to be strong enough because I've fitted thousands of these Baytrax over the thirty years almost.
And also, the joists are never going to be in the right place to fit all your brackets.
If you watch my other fitting videos, you'll see how I approach this. You don't need to know where all the joists are because they're not going to be in the right place. So you can hear that's hollow. All ceilings are hollow or almost all ceilings, unless you've got a concrete ceiling, but almost nobody does in a domestic dwelling. So if you're hanging domestic sized curtains, even big ones, blackout, floor length, really wide, as long as they're not like four meters long and six meters wide, and you truly are super heavy stage curtains, but this website is not about those kind of curtains and those kind of tracks. It's about domestic sized curtains, domestic sized windows.
Fitting the Curtain Track
So you're going to present your track to the ceiling. You're going to screw all the screws in. If you have bad fittings, then you use the plugs that we supply. The plugs we supply with the screws will suit ninety five, ninety eight percent of the fittings that you need to do and give you a firm enough fixing.
You're almost certainly when you're doing all the brackets up into the ceiling and just driving the screws in, you're going to hit some timber in the ceiling. Fantastic. You only need to worry about the ones where you don't. The ones where you don't, then if our plugs are still not giving you a firm no fixing, which is highly unlikely, then there's a couple of other fittings here that we use.
Alternative Fittings and Tools
And you can find the links to these in this video. And also, if you're watching it in the right place, you'll see the links below the video.
Now use these. We only use these if our regular fittings fail, and that's almost never.
But it's handy to know where they are, where you can get them from. I get both of these from Screwfix. Nice and cheap. So start with the basics and then move on to these if you have to. Now at the end of the track, on each end, just within the ceiling, just within the bay, there's going to be a beam across the top of the ceiling.
Dealing with Metal Lintels
Now, almost certainly, in most houses now, you're going to find it's a metal lintel. If it's timber, fantastic. You just drive the screw in, you've got a good grip. If it's metal, you're going to need to use the drill bit that you can find in the link in this video that takes you to Screwfix.
And it's a three and a half mil high speed drill bit, and it will cut pilot hole into the lintel. You'll be able to use the screws we supply to then drive directly into that hole without using your plug. That will grip. If you've got a track that returns out to the bay on each side, almost certainly, it's going to be going into brickwork.
Fixing to Brickwork
So use the plug supplied, six mil masonry drill bit, drill the hole, fix your wall fixed bracket on the return.
So that's fundamentally it. Don't worry. You don't have to go upstairs and pull the floorboards up. You don't need to start looking, you know, where every individual joist is because they're not going to be in the right place to support your track.
Final Installation Tips
You're going to be moving your brackets to where the joist is, but it's not going to give your track the support to suspend your curtains from this track. So forget about that. Just follow the guide the fitting guide, and they will show you how to fit our tracks. And then also just use the links in this video to get the bits that you may need.
You don't have to buy all these straight away. Just nip out your local branch if you need them. But almost certainly, you're not going to need them other than these three and a half mil drill bits for piloting the lintel across the top. So your last bracket on each side before your track turns out to the bay.
If it's not turning out to the bay, then the end of the track here is going to be nice and secure to hang your curtains because it's going to be fixed into that metal lintel. And if it's a wooden lintel in a really old house, then fantastic. Don't need to do any drilling. You just screw the screws directly in and you got a super solid fixing.
Conclusion and Support
So I hope that helps. And if you have questions as you move along ordering, fitting, then just get in touch.
Show/Hide Transcript
Introduction to Bay Window Ceilings
Hi. I'm Lee Stevens from ezecurtains.co.uk
And I want to talk to you about battens on bay window ceilings.
Debunking the Need for Wooden Battens
People talk to me all the time about, do I need to fix wooden battens to the ceiling in my bay? And the answer is absolutely not. They just look plain ugly, and they do not achieve anything. You might as well fix your track directly to the ceiling. Our tracks are designed to be well fitted to ceilings in bay windows.
Bracket Distribution for Stability We supply twice as many brackets into the ceiling as most of our competitors. So the weight's more evenly distributed.Alternative Fixings for Plasterboard Ceilings
You're going to find that mostly you're into plasterboard in ceilings, which is fine with the plugs that we supply. Now if you had a spot that our plugs are not doing the job, then there's alternate fixings. And there's a video that you can see a link to here that shows you what those alternative fixings are and how to use them.
Fixing Techniques at the Bay's End
When it comes to the end of the bay, and just before you leave the bay on each side, assuming you're gonna return out onto the walls, you're gonna be fixing into the lintel over the top of the window.
Again, the fitting videos discuss that in more detail.
Final Recommendations on Installation
When you return out to the bay, if you're going to return out onto the walls on each side of the bay, you're gonna be fixing almost certainly into brickwork. So they'll be nice and solid fixings. So when it comes to the wooden battens, don't use them. Fit directly to the ceiling. Our tracks are designed to fit flush to the ceiling, and they're really sturdy, solid, and you won't need to use wooden battens. So I hope that was useful.
Show/Hide Transcript
Introduction to Ceiling Fitting
Hi, I'm Lee Stevens from Ezecurtains.co.uk
And I want to show you what to do if you're fitting a track to the ceiling in a bay or a ceiling in a room, and you're struggling to get a good fixing.
Alternative Fixing Method Explained
Here's an alternative fixing that you can use. So let's go and have a quick look. Okay. The fixing we're going to use is a toggle bolt. We've got a screw head on this end and then we've got two little wings that are spring loaded on this side, and they'll pop open once we go through the hole that we're going to drill into the ceiling with an eight mil drill bit. So let's go and have a look at that.
Preparing the Ceiling for Installation
Creating an eight millimeter hole in the plasterboard ceiling ready to fit the, toggle bolt.
Installing the Toggle Bolt
Okay. We've got the, regular track here with the bracket on ceiling fix. And we've got the toggle, with the wings on the top here now. And we've got this screw head inside the bracket. So we're going to present this up to the ceiling now and pop it into that hole we've just created.
So let's go and have a look at that.
Okay. I've got the wings on the toggle folded backwards, and we're popping it up now. And I could hear the wings pop open. And if we pull this down now, the wings are holding it up in there. So we're going to just use a driver now to tighten up this. And you need to pull down on the track and the bracket.
Securing the Track to the Ceiling
And there we go. That toggle bolt has now firmly fitted that track up to the ceiling.
Do that for any brackets that you're not happy that are completely solid up to the ceiling.
Final Thoughts on Installation Techniques
Okay. So we got that track now, and I'm really pulling down from the ceiling, and that is a solid fixing. It would take an enormous amount to break that to fixing free. So only use these if the red plugs we supply are not doing the job well enough, then get a packet of these from Screwfix. You can find the link in the video just here, to the ones that I use, and, you'll have no problems at all fitting your track to a ceiling in a bay or just over the top of the window on a straight window. So I hope that was useful.
This video below shows you all the bracket options available with our regular bay window curtain tracks. You don't have to worry about choosing the correct brackets. We look at your order details and bay photo. then select the optimum brackets for your bay track.
Show/Hide Transcript
Introduction to Ezecurtains
Hi. I'm Lee Stevens from ezecurtains.co.uk
Overview of Wall Bracket Options
And I want to talk to you about the wall brackets that we offer with our regular track. That's regular bay track, regular wall fix track, the brackets that you're going to use for any wall fix that you do. We've got four options. We've got the three centimeter wall bracket, four centimeter wall bracket, six and a half centimeter wall bracket, and nine centimeter wall bracket.
Understanding Bracket Projections
That's the projection off the wall to the front edge of the track once it's fitted on the bracket. So that's the distance it'll push off the wall. So let's have a look at the two different styles that we've got of these four brackets. So if you want to move in, we'll have a quick look at those.
Installation of Clip-In Brackets
Keep it running. So with the three and four centimeter clip in brackets, once your bracket is screwed to the wall through the hole in the bottom here, you present your track to the front of the bracket and you tap it.
And it locks. That click is locking it in place now. Now it locks solid. If you find you need to release it, underneath is a little lever. Push it with your thumb, twist the track, and it pops off.
Lever Lock Bracket Mechanism
Now when it comes to the six and a half and the nine centimeter bracket, we have what we call a lever lock bracket.
And there's a little lever here with a cam on the front and that slots into the bottom. But prior to putting the cam into the bracket on the front, we keep that out because it gives you access to fix the bracket here.
Important Installation Tips
And with these brackets, we supply a little washer with the screw so that you need to have the washer on before you put the screw in here because if you don't, it then when you tighten it up, forces that slot to open up and potentially damage the bracket. So washer on the screw, fix the bracket.
Finalising the Bracket Installation
Once the bracket's fixed in place, you push these little cams in, hear a click, and then we've got the lever in position here now. So that needs to be pointing downwards six o'clock.
The track goes to the front like so, and then you turn the lever either left or right, and that bracket is now locked solidly in place.
To unlock it, push the lever back to six o'clock at the bottom, and the track comes off. And that's all there is to it.
Summary of Bracket Types
So there you have it.
Two brackets that are clipping, three and four centimeter projection brackets, then two brackets which are lever lock, six and a half centimeter and nine centimeter projection brackets.
Conclusion on Wall Fix Brackets
So that's all your options for the regular track on wall fix brackets.
We deliver to all of the United Kingdom mainland such as Aberdeen, Edinburgh, Glasgow, Newcastle, Manchester, Birmingham, Swansea, Bristol, Nottingham, London, Southampton, the Isle of Wight. Also, Northern Ireland.
Yes, your personal details and payment details are completely secure when using this website. You can read what our form supplier Cognito Forms says about the level of security they use to protect your data.
Ready To Get A Price For Your New Double Bay Window Curtain Track?

Regular double bay track calculator
Need some help?
Not sure how to complete this form above to get a price for your bay. Then watch the help video here.
Any problems using this form then please just ask the 24/7 Help Assistant in the bottom right of your screen. You will get an instant answer any day or time. Still not finding the answer!
Then send us a message here and we will get back to you within 24 hours. Or call call us on 0800 246 5091 between 9am til 6pm (Mon to Sat).
- Home
- Bay Window Double Curtain Rail
- Double bay window curtain tracks
You might like these
Slimline Double Bay Window Curtain Tracks - Custom Made - Lowest Price
Guaranteed Smooth Running Slimline Double Bay Window Curtain Tracks - Easy Fitting - Video Support - Quick Free Delivery -10 Year Guarantee - Order Online Today
Bay Window Double Curtain Rail - Custom Made - Lowest prices
Guaranteed Smooth Running Bay Window Double Curtain Rail - Easy Fitting - Video Support - Quick Free Delivery -10 Year Guarantee - Order Online Today!

Ezecurtains Ltd - Company Registration No. 13539270
Copyright © 2010 - 2025 ezecurtains.co.uk. All Rights Reserved
Ezecurtains ™ Is a tradmark of Ezecurtains Ltd